In the sixth part on the basics of Figma, we will learn how to work with gradients. Specifically, we will understand the types of gradients that exist, how to create and customize them in practice. We will talk about plugins for Figma and install and use several of them right during the lesson.
- Gradients and Color Fill in Figma
- Linear Gradient (Linear)
- Radial Gradient (Radial)
- Angular Gradient (Angular)
- Diamond Gradient (Diamond)
- Gradient Settings
- Opacity
- Eyedropper
- Ability to Set Color Code
- Adding Points to Gradient
- Gradient Angle and Direction
- Practical Examples
- Plugins for Gradients in Figma
- How to Work with Plugins?
- Getting to Know Plugins and Figma Community with uiGradient
- Working with the uiGradient Plugin
- Easing Gradients Plugin
- Chromatic Figma Plugin
- Homework
- Conclusions
Probably, most of the readers of this lesson already know that a gradient – is a smooth transition from one color to another. To display a gradient, at least two colors are needed, that is, two key points between which a smooth transition will be formed, consisting of intermediate shades.
With the help of key points, we can change the gradient; the more there are, the more complex transitions we will achieve.
We have already learned how to paint an object in color using the eyedropper in the fifth lesson. We can also assign a color to an object without using the eyedropper by selecting it manually. To do this, we use the right sidebar. Go to the object and click on the Fill settings panel. By default, the object will be filled with a single color (Solid). We can change this by moving the selected color circle with the mouse on the color selection panel.
In this same panel, in the Fill dropdown menu at the top left, instead of filling with color, you will be able to choose a gradient fill. Most graphic editors have four types of gradients: linear, radial, angular, and diamond gradient (rhombus-shaped).
The color transition in this type of gradient occurs along a straight line. It is worth noting that in almost all cases, you will be using this gradient. It most naturally and attractively conveys transitions. To apply a linear gradient fill to an object, select it from the dropdown list Fill on the panel and set the colors for the points as shown in the video below.
Unlike linear gradients, in radial gradients the color spreads out in a circle, starting from its center. The color on the left will be reflected at the center, while on the right - at the periphery. To use a radial gradient, in the Fill menu select Radial.
The color transition in this gradient mimics the shape of a spiral and at the color junctions imitates a "corner". Let's see how it works on the Fill panel.
Creates color transitions from the center of the diamond to its outer facets. Similar to a radial gradient, but in the shape of a rhombus. It should be applied in the following way.
It is not enough to convert the fill to a gradient to achieve the desired design result. Therefore, Figma has additional settings, namely:
- opacity;
- eyedropper;
- the ability to specify a specific color code;
- adding additional points;
- the angle and direction of the transition.
Allows you to change the saturation of the color gradient by altering the opacity of the key point. For example: if we have a linear gradient consisting of two points, the first with an opacity of 100%, the last 0%, then in the middle of the gradient transition the opacity will be 50% and the editor will automatically calculate the final color.
Allows copying colors for key points of the gradient. In practice, it is a very useful feature that allows, for example, to extend the background of an object by darkening/lightening it from another edge.
Allows the designer to specify the color for each key point accurately. The Fill panel allows working in different color formats. The most popular are HEX and RGB, which are actively used when creating brand books. For example, the client in the technical assignment can specify the required colors with specific values. Examples of HEX codes: #021A0D or #C22900.
The three previous functions also work with filling the object with a single color (Solid mode).
Allows for better control of color transitions: avoiding transitions with muddy shades, as well as creating very complex gradients.
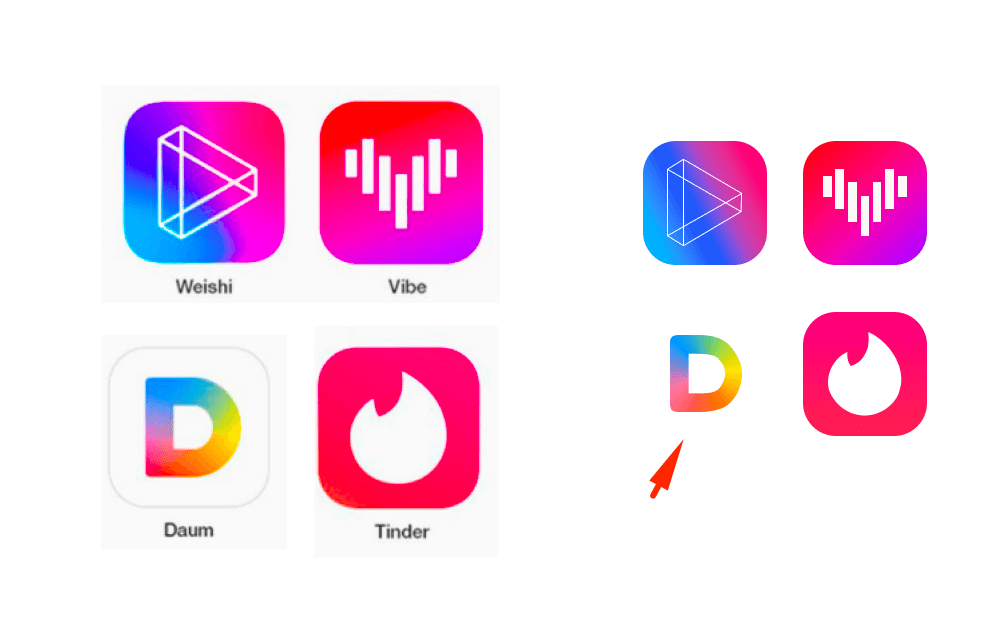
A popular successful example of a multicolored gradient is the logo of the social network Instagram, which has been popularizing gradient trends in the digital sphere for several years now.
![]()
I think from the previous videos, you have already visually understood that we can set the gradient to any angle. To do this, we need to open our gradient in such a way that the points are visible over the shape and manually rotate it by holding down the left mouse button.
Gradients have a multitude of applications in both graphic and UI design. Let's look at some examples that you can use independently in practice.
Adding volume to a figure. We simulate a three-dimensional render, but using only two-dimensional tools. In this way, the ball appears quite voluminous. Color transitions replace the play of light and shadow.

Imitation of figure movement. Again, only through color transition and playing with opacity, the human eye perceives the object as moving. Such illustrations, even in static form, can become a wonderful visual addition to the site.

Volumetric interface elements. You can support the theme of volumetricity through interface elements, for example, with gradient buttons. Remember that moderation is key in everything!
![]()
Gradient on the background. Compare the two examples of filling below. Both certainly have their merits, but agree that the second has more advantages. The human eye has something to latch onto, the light area draws attention to the text, and the color solution looks more interesting.


Another example – compare the background fill with a gradient and a solid color. The gradient adds just a few accents, but makes the image as a whole more interesting.

If you have completed the previous lessons, I think you have already noticed that we are currently studying the basic functionality of the Figma graphic editor. But besides this, there is the possibility to add new features using plugins.
Plugin – is a separate module created by a third-party developer to extend the functionality of Figma or to simplify or speed up the work of existing capabilities.
In the main menu of Figma, there is a Plugins item that allows you to run already installed plugins as well as find new ones. This is managed by the Manage Plugins item.

Community in Figma – is a community of Figma users where designers share useful resources with each other. You will find both free and paid content there. In addition to plugins, you will see icon sets, website layouts, mockups, templates, illustrations, and much more.
uiGradient is a plugin that quickly applies a gradient to your selected shape. It contains dozens of beautifully curated color combinations. If you find it hard to choose a good gradient, uiGradient was created for you.
Let's try to install your first plugin for Figma:
- Go to the main page of Figma.
- Then click on Explore community in the lower left corner.
- You can use the Plugins tab to manually search for the necessary plugins. But it will be much faster to enter the name of our extension "uiGradient" in the search field and press Enter.
- The search will yield a list of results, find the required plugin and open it in one of your files.
This action could also be done through the Plugins tab and the Manage Plugins function. But it was important to show you another way so that you can explore the Figma Community resources on your own in the future.
The extension is open. Now you need to understand how to work with it. First, select the object you want to recolor. Next, launch uiGradients in one of these ways:
- through the Plugins context menu item, selecting the desired extension from the list. To bring up the context menu, right-click;
- through search by pressing Ctrl (Cmd) + / and typing the name in the search bar + Enter.
The second method may be more convenient if you want to install many plugins in the future and it will be harder to quickly find them in the list.
This is a good tool that allows for smoother transitions within the gradient itself. Essentially, the extension is designed for gradients that use opacity at key points. The result is especially impressive with a black-and-white palette.
Example: very often, to improve text readability on photos, a gradient fill is applied on one side that should smoothly fade into the photograph. However, in the case of a small image size, the transition can be quite noticeable. This is where Easing Gradients comes in handy, allowing you to adjust the steepness of the transition using curves.
In order for the plugin to work, you first need to select a shape with an already applied gradient, and then run the plugin through the menu or search.

The other problem, after harsh transitions, is the so-called «color dirtiness». Between two key points of the gradient, the computer sometimes selects a rather dirty transition. This problem can be fixed manually by adding new key points with cleaner shades of color.
But if you still do not feel colors well enough, which is typical for all beginners, you can use the Chromatic Figma plugin, which will visually enhance the gradient and literally do the dirty work for you.
Select a shape with a gradient, run the plugin, choose Fix Gradient, and click Apply.

From now on, this course is designed for independent study and completion of homework assignments. I understand that some tasks may be challenging for you.
For additional support, please use the chat on Telegram. Here you can ask questions related to the lessons or view examples of correct execution from other students.
The chat is not available for citizens of Russia.
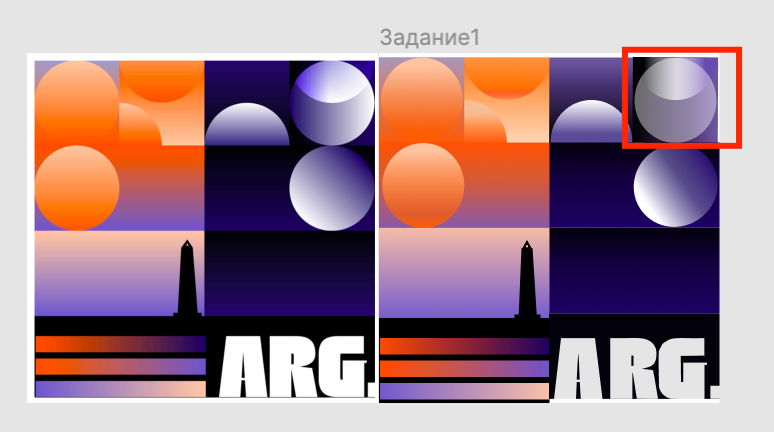
Task 1. Accurately redraw the image with the illustration presented below. Rely on the skills you have just acquired in working with gradients.

Task 2. Install all three extensions for gradients that you learned about in the lesson.
Task 3. Draw any three shapes and independently set different gradients. After that, create duplicates of these shapes and apply the Chromatic Figma plugin to them. Submit the result with a link to the Figma file.
Practicing with gradients in Figma will greatly expand your capabilities and make your design more interesting and diverse. The information about the existence and use of plugins will make your work easier in the future. I hope you have grasped the material of this lesson well and complete the homework I have prepared for you, as an even more exciting world of design awaits you.
Д/з до уроку 12. Але щодо третього завдання я використала плагін Chromatic Figma, але різниці сильної не помітно.
https://www.figma.com/design/VFVFfmMTCjhgpprIJNzNnJ/Homework-12?node-id=9-109&t=DoMcO6xqTPX5eU75-1
Коментар frusia.pro:
Добрий день, Анастасія!
Завдання 1. Перемалювати ілюстрацію в векторі. У вас вийшло дуже схоже, добре попрацювали! Лише башта залишилась у вигляді растрового зображення. У наступному уроці ви побачите, як можна з легкістю повторити її складну форму. Бачу, що з градієнтами ви розібрались на відмінно.
Завдання 3. Застосувати плагін до намальованих фігур. Дійсно, різниця непомітна у вашому випадку, але це і не є критичним. Важливо, що ви зрозуміли, як працюють плагіни у Фігмі.
У вас дуже добре виходить, продовжуйте навчання, вам залишилось пройти лише один урок, щоб закінчити курс!